PEX - Sync to Xero
Synchronizing your PEX account with Xero ensures seamless financial data flow between the two platforms, enabling efficient expense management and accounting processes. This guide provides step-by-step instructions for setting up and maintaining this integration.
Prerequisites
Before you begin, ensure you have:
- An active PEX account with integration permissions
- An active Xero account with integration permissions
- Administrator access to both PEX and Xero accounts
- Signed into your Xero account in a separate web browser tab
Pro Tip
Signing into Xero beforehand will simplify the authentication process during integration.
Steps to Synchronize PEX with Xero
1. Log in to Your PEX Account
- Open your web browser and navigate to the PEX login page.
- Enter your credentials and click "Login".
2. Access the Integration Settings
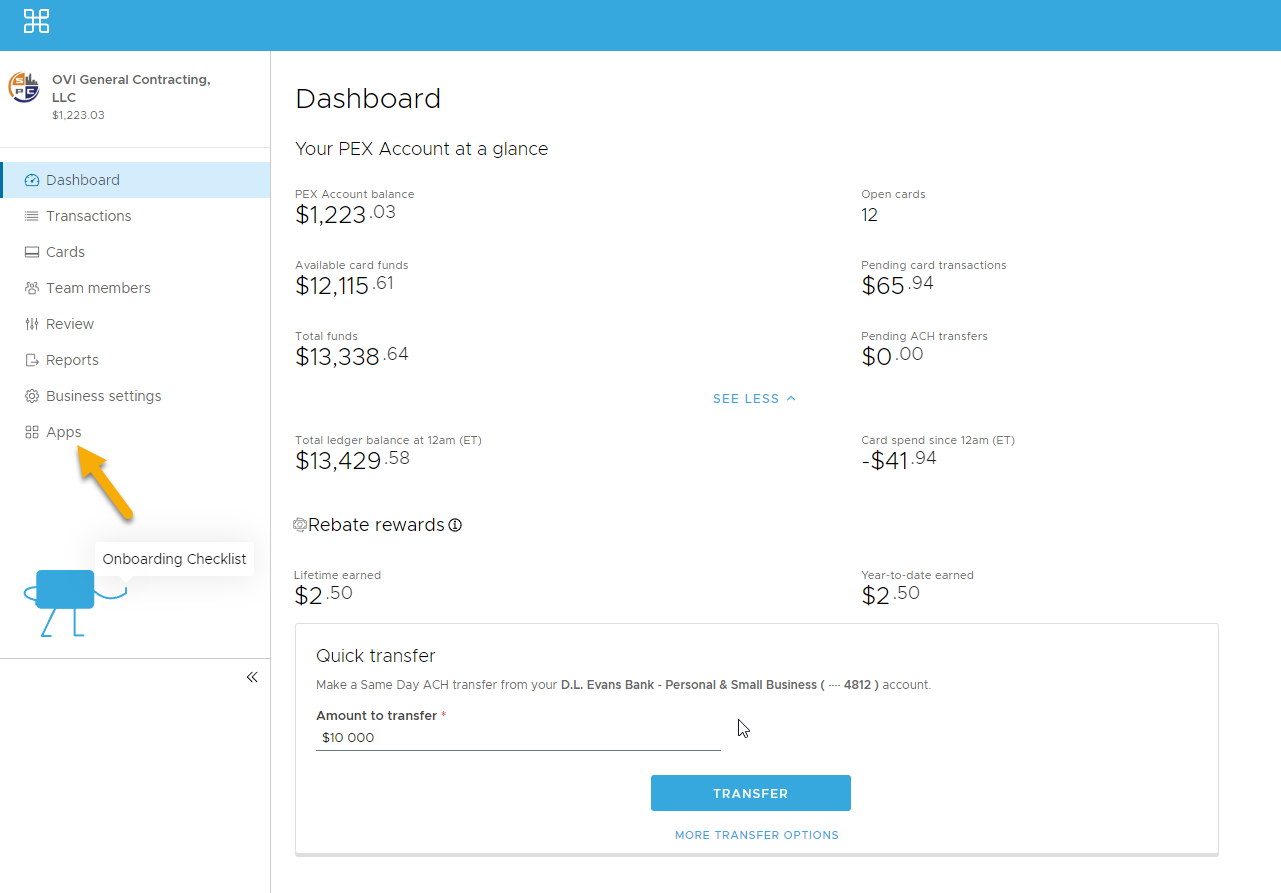
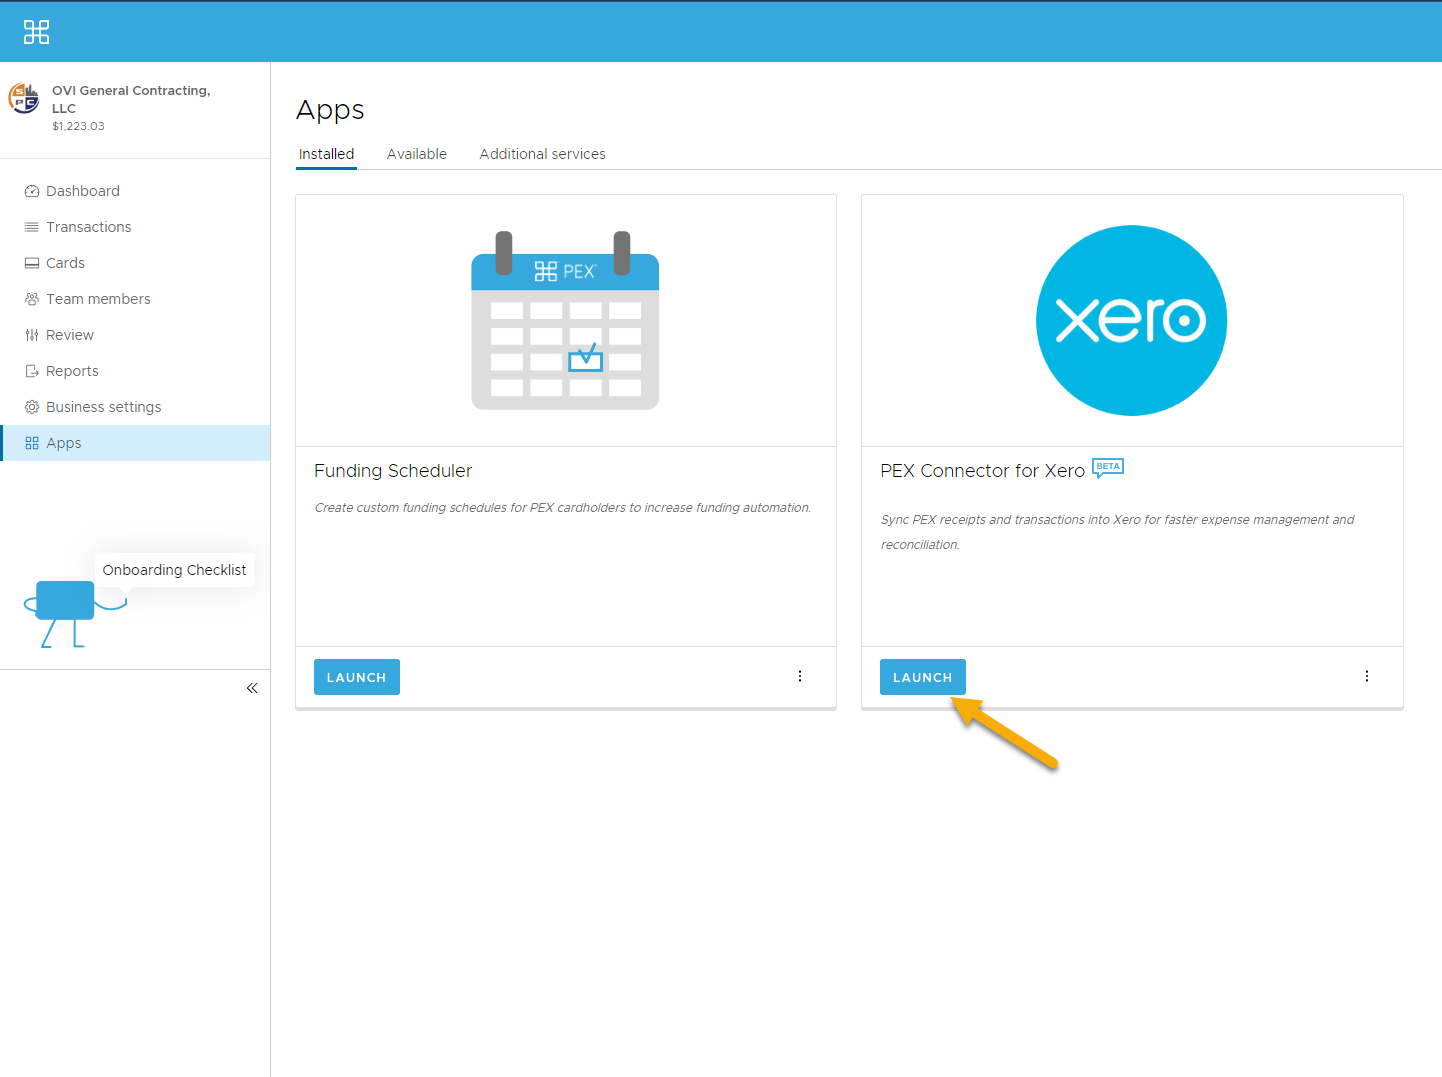
- Once logged in, find the Apps icon at the bottom of the left navigation menu.
- On the Apps page, locate and select Launch for the PEX Connector for Xero app.
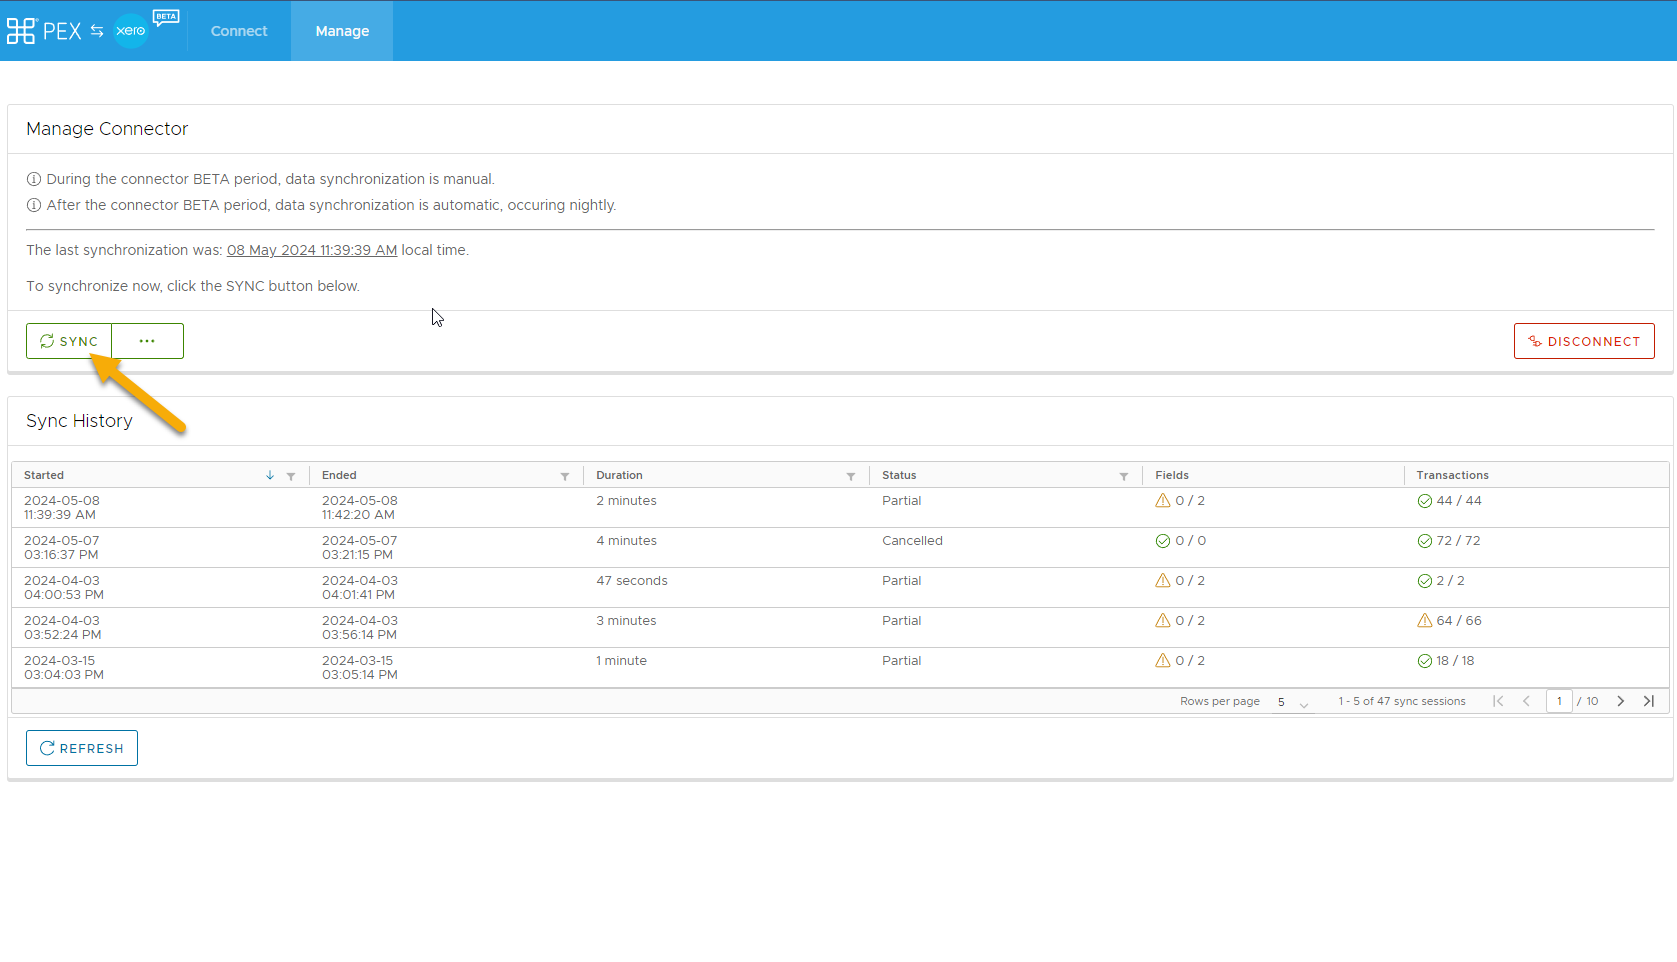
3. Run Sync
- Select the SYNC option on the left side of the page.
Important
Stay on the sync page until the operation completes. Leaving or refreshing the page will cancel the sync.
Sync Timeout
If the sync operation times out due to a large volume of data, check Xero for the transferred transactions. If some are missing, run the sync operation again in PEX.
How to Re-Initialize the PEX to Xero Connector
-
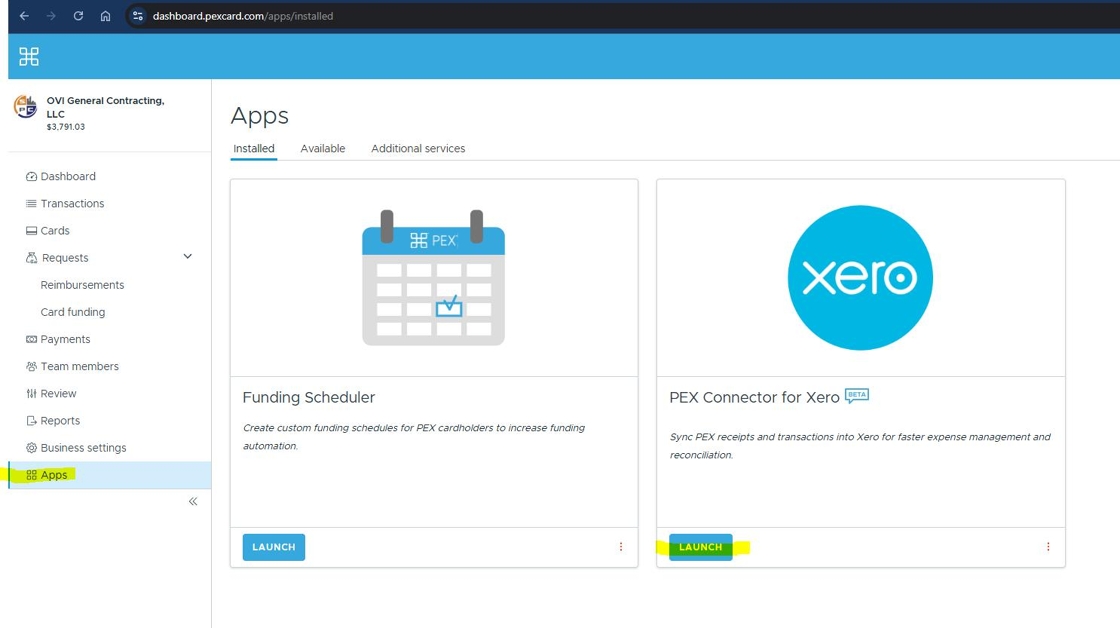
In PEX, navigate to Apps, and Launch the Xero app.
-
If the "Sync" option is grayed out, it will be necessary to use the "Connect" feature to relink the account. This seems to happen about once per month or so.

-
Click here

-
Click here

-
Click here

-
Click here

-
Click here

-
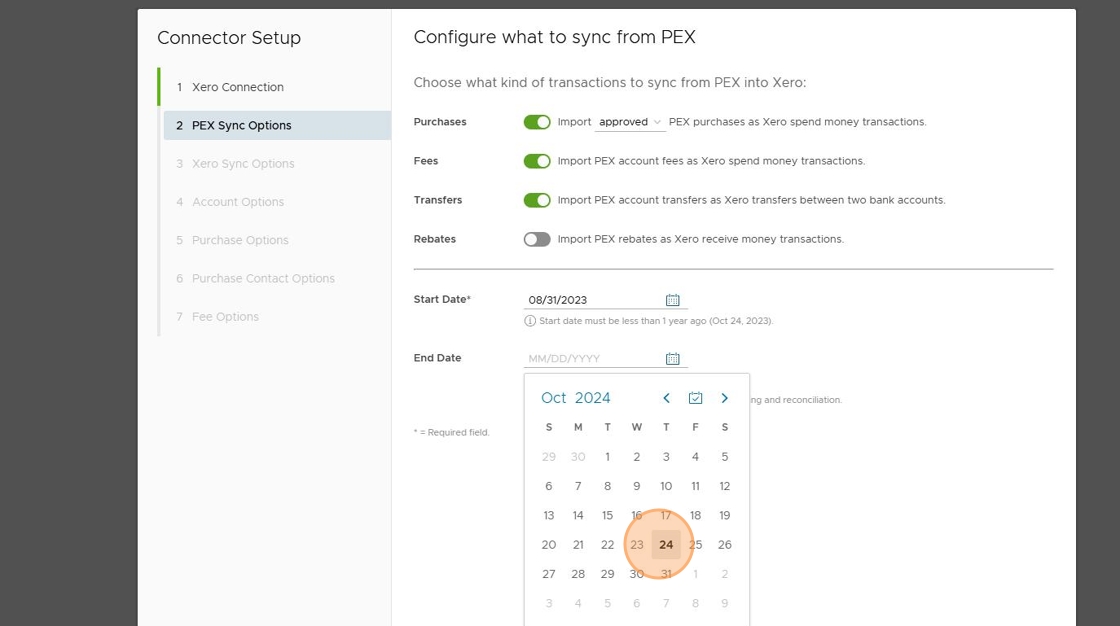
Select the Start Date, and set any date that includes your sync period. Note: This cannot be older than one year.
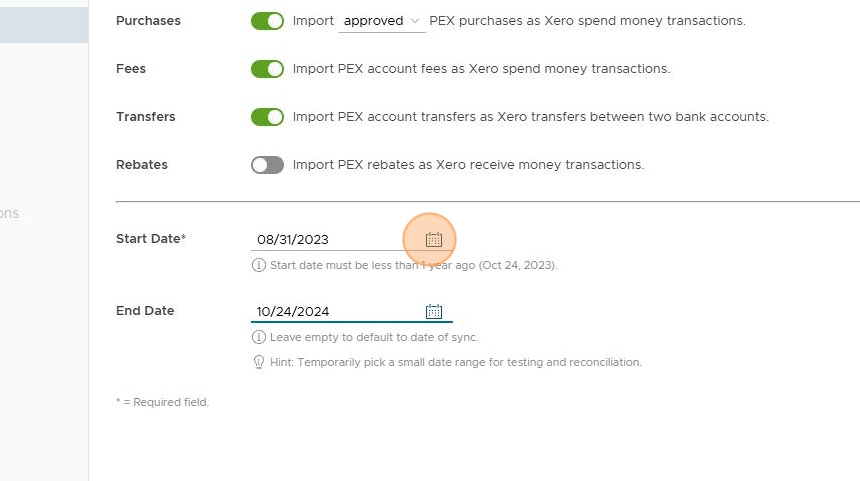
-
Set this to the desired sync date, usually the current date or the last day of the previous month.
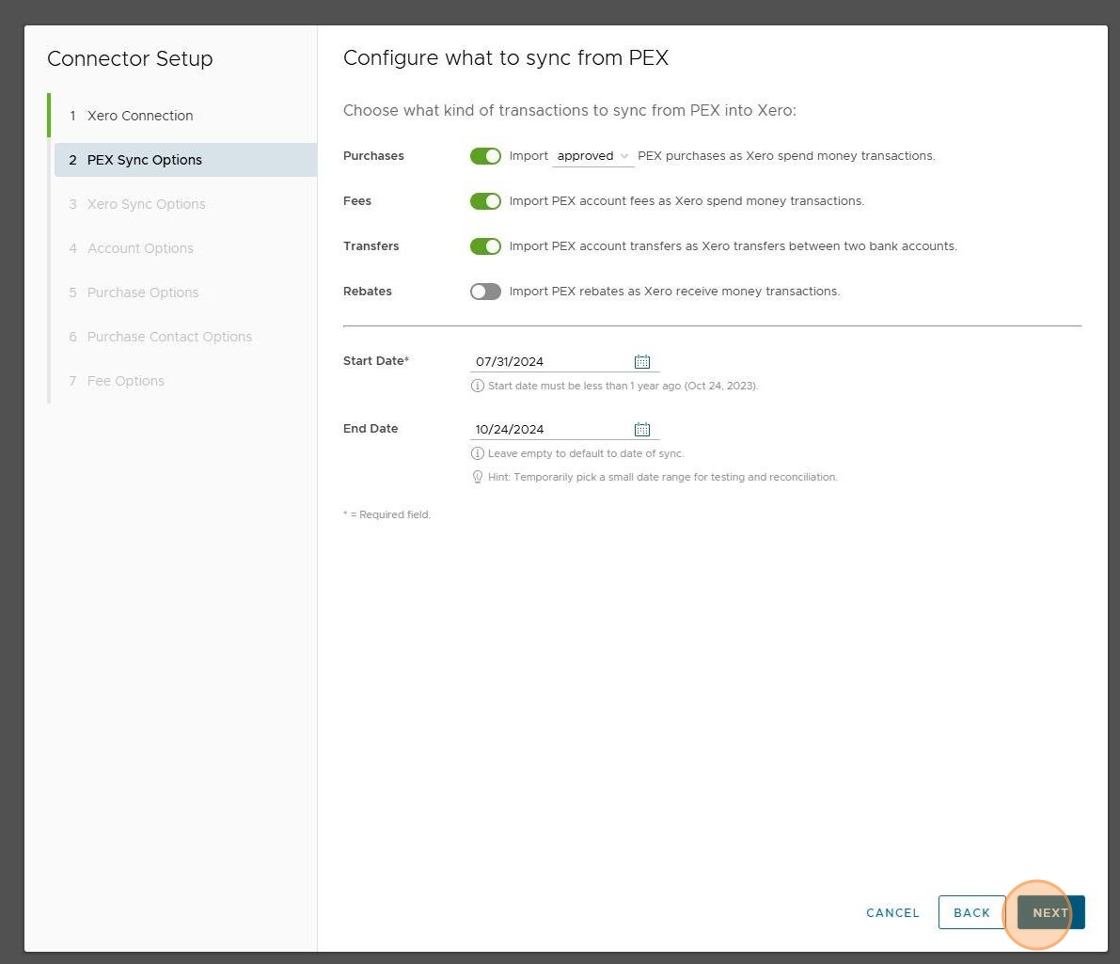
-
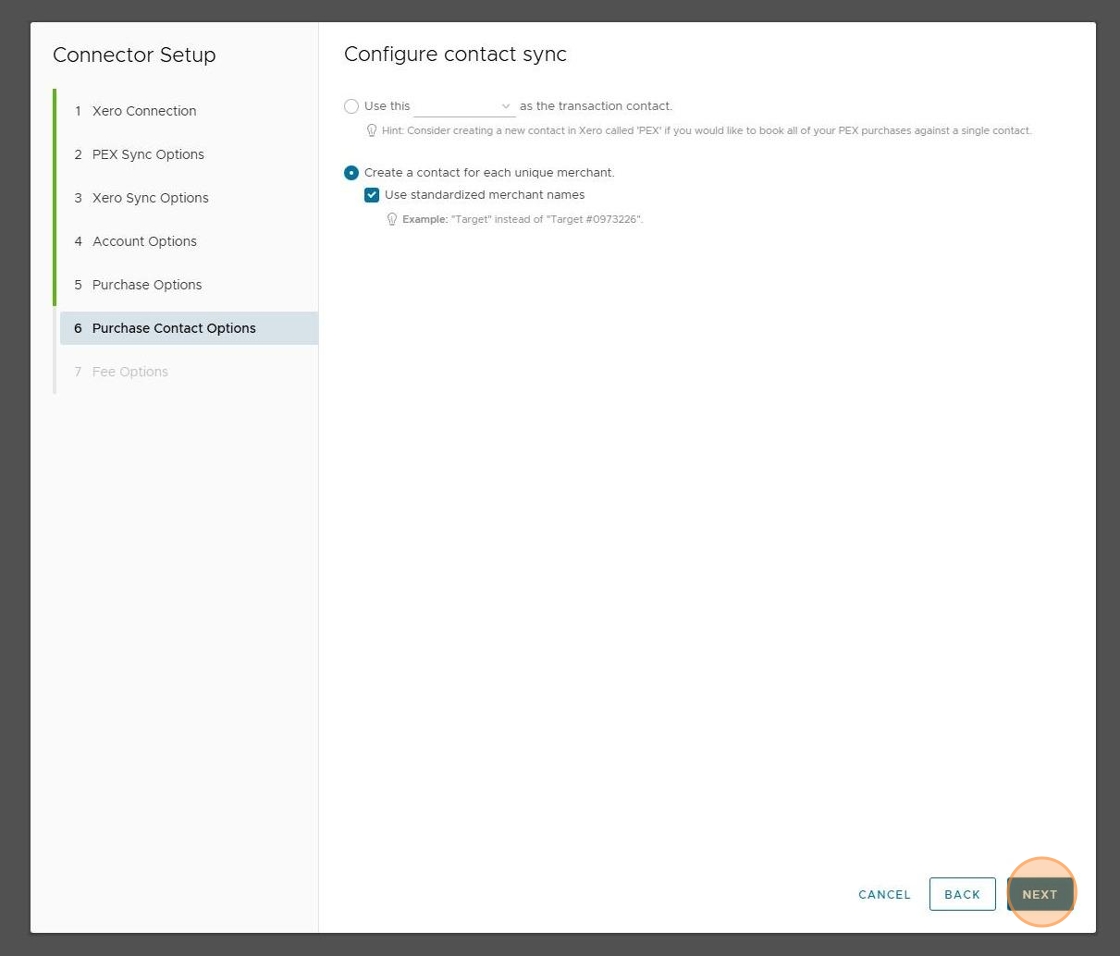
Accept the Defaults
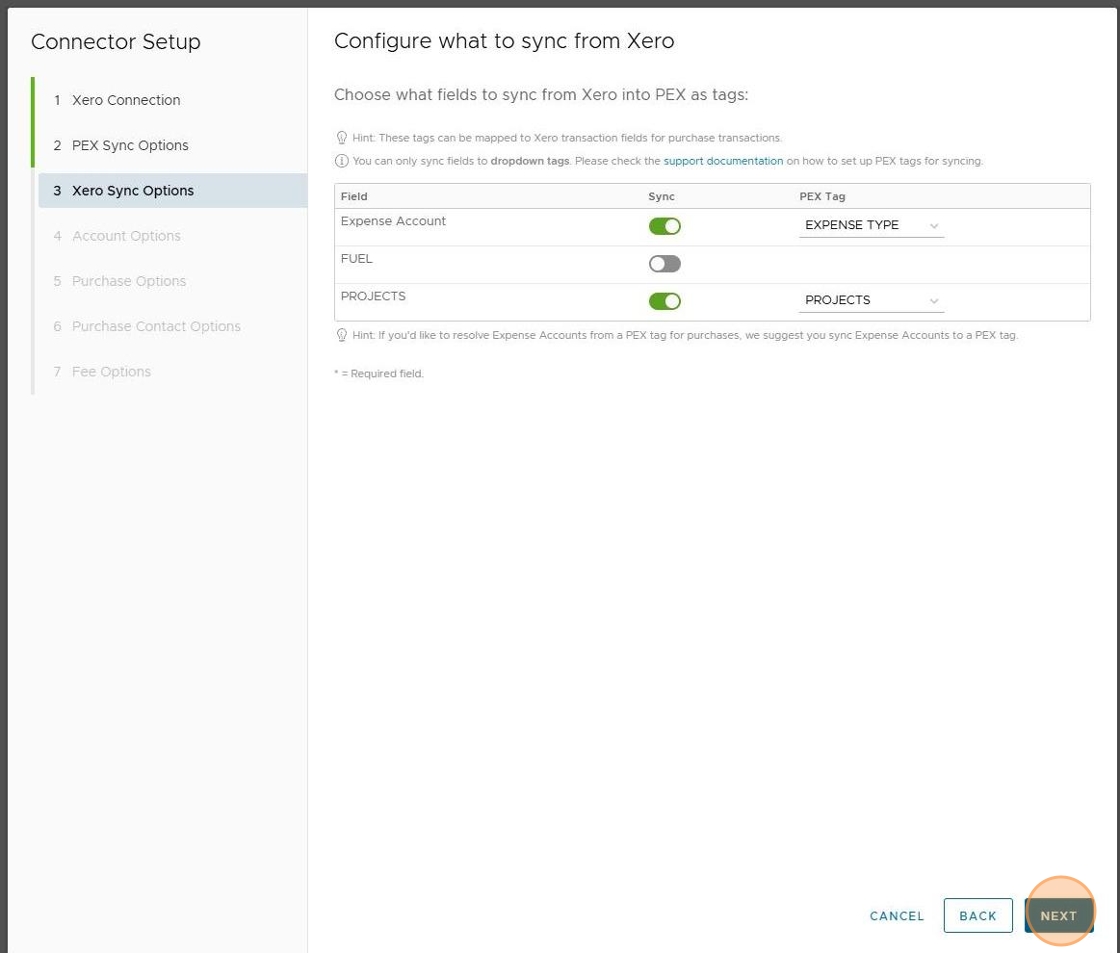
-
Accept the Defaults (Fuel is off)
-
Accept the Defaults

-
Accept the Defaults

-
Accept the Defaults
-
Accept the Defaults

-
Now the PEX connector Sync feature will be enabled again.
Troubleshooting
If you encounter issues during the sync process:
- Ensure both PEX and Xero accounts are active and have the necessary permissions.
- Check your internet connection stability.
- Clear your browser cache and cookies, then try again.
- If problems persist, contact PEX support for assistance.
Pro Tip
Regularly syncing your PEX and Xero accounts ensures that your financial data is up-to-date and accurate across both platforms.