PEX - Transaction Export
Overview
This procedure outlines the step-by-step process for exporting PEX transaction records from the previous month. PEX (Payment Expense) card transaction exports are essential for financial record-keeping, expense tracking, and reconciliation. This guide will help you navigate the PEX platform to generate and download the previous month's transaction data in CSV format.
Important Note
This procedure specifically covers how to export transaction data for the previous month only. For current month or custom date range exports, a different process may be required.
Procedure
Accessing Reports
- Navigate to the Reports Section
From the PEX dashboard, locate and click the "Reports" button to access the reporting interface.

The Reports section contains various reporting options and date range selectors for transaction data.
Setting the Date Range
- Select the Previous Month Period
In the date range options, click on "Last month" to automatically set the reporting period to the previous calendar month.
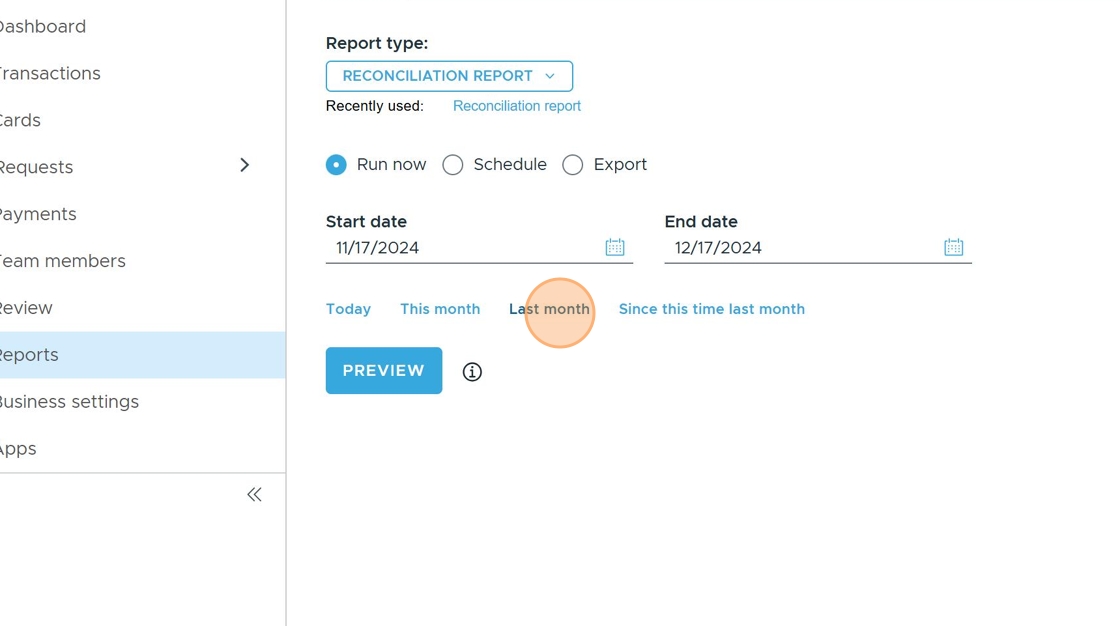
!!! tip "Time-Saving Feature" The "Last month" option automatically selects the entire previous calendar month, saving you from manually entering date ranges.
Generating the Report
- Preview the Report Data
Click the "PREVIEW" button to generate a preview of the transaction data before exporting.
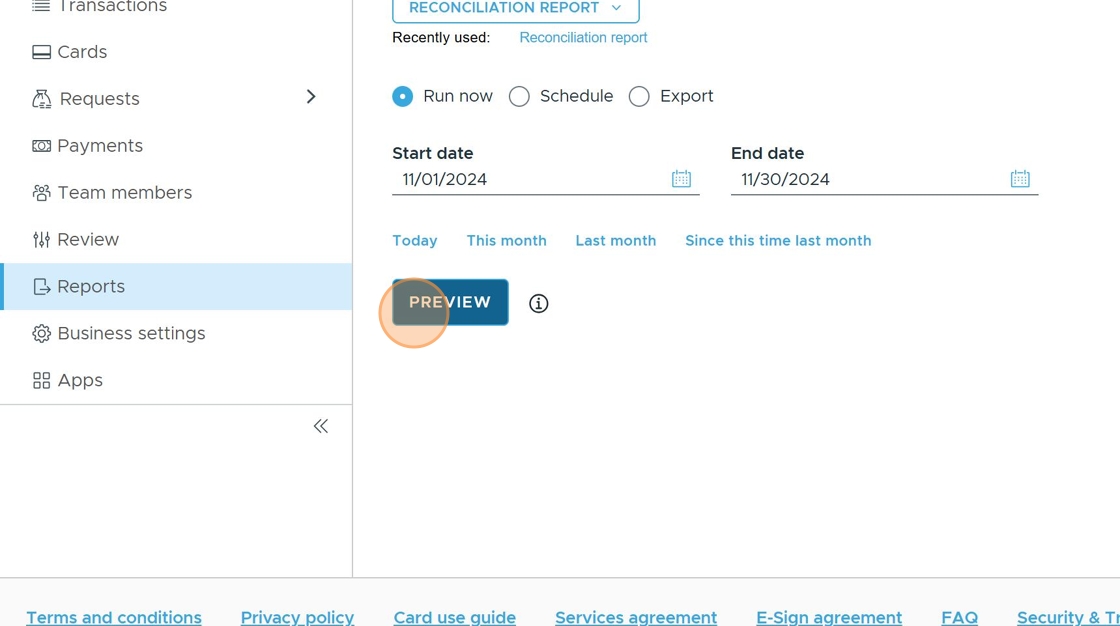
This step allows you to verify that the correct data will be included in your export before proceeding.
- Export to CSV Format
After previewing the data, click the "GENERATE CSV" button to create a downloadable CSV file of the transactions.
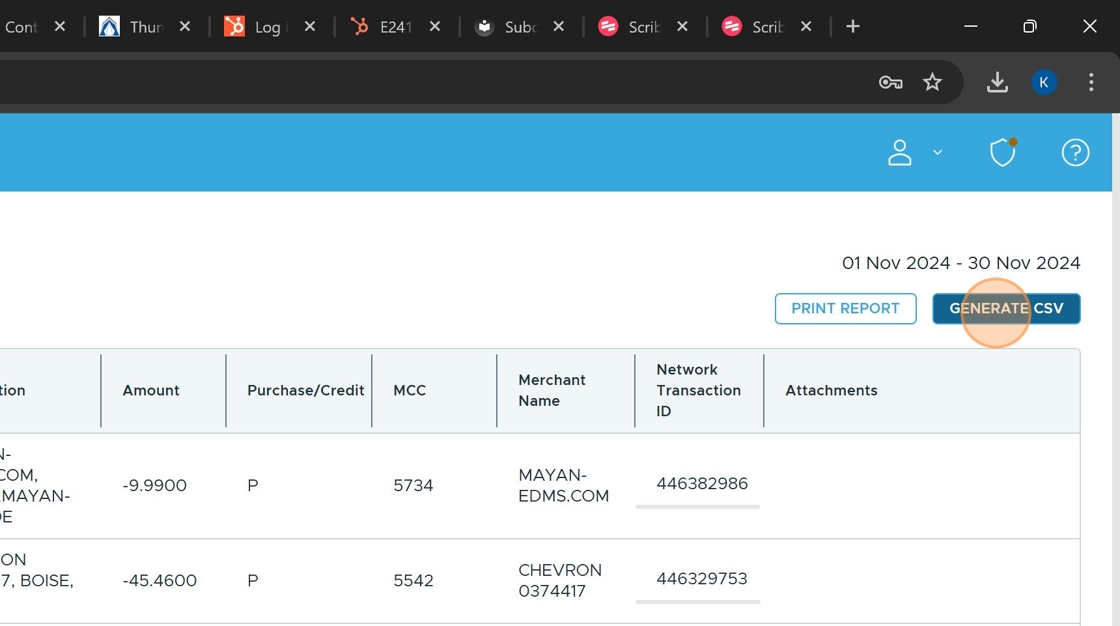
!!! note CSV (Comma-Separated Values) format is compatible with most spreadsheet applications and financial software.
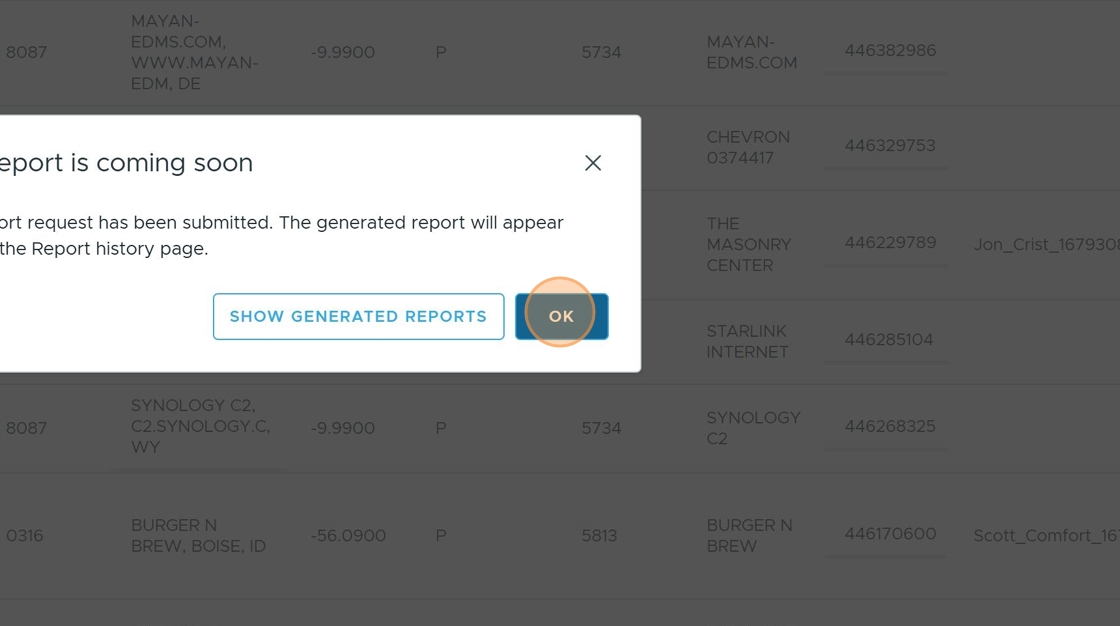
- Confirm the Export Request
A confirmation dialog will appear. Click "OK" to proceed with generating the CSV file.
Accessing and Downloading the Generated Report
- Return to Previous Screen
After confirming the export, click "Go to previous screen" to navigate back to the main reports interface.

- Access Report History
Click on "Report history" to view your generated reports.
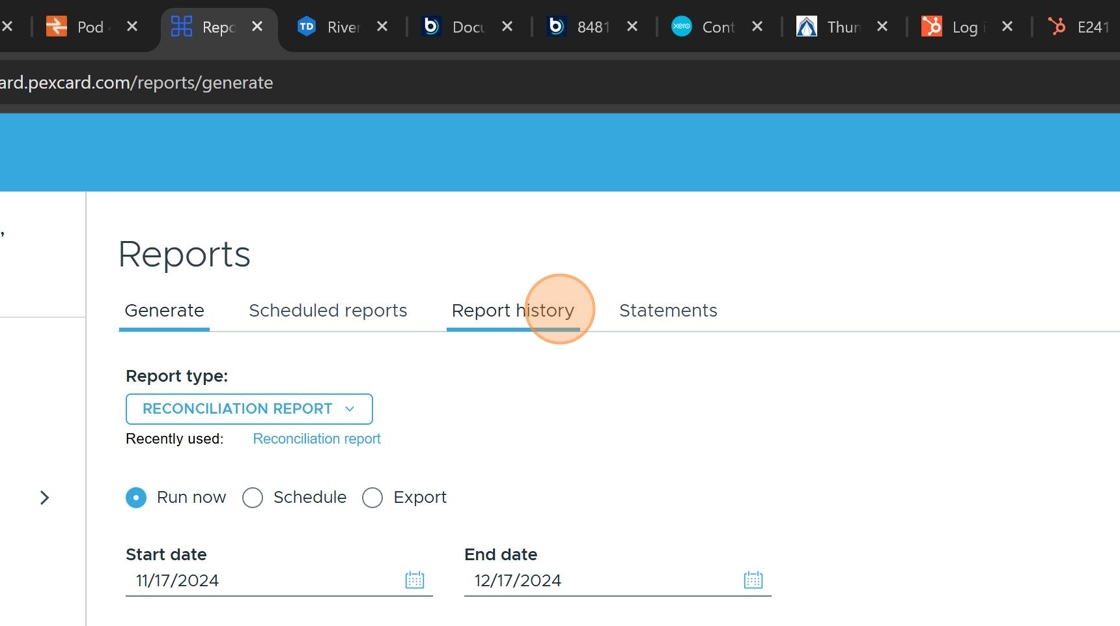
The Report history section displays a list of all reports you have generated, with the most recent at the top.
- Download the Generated Report
Locate your recently generated report in the list and click "Download item" to download the CSV file.

!!! warning "Report Expiration" Downloaded reports may expire after a certain period. It's recommended to save the file to a secure location promptly.
Opening and Verifying the Downloaded File
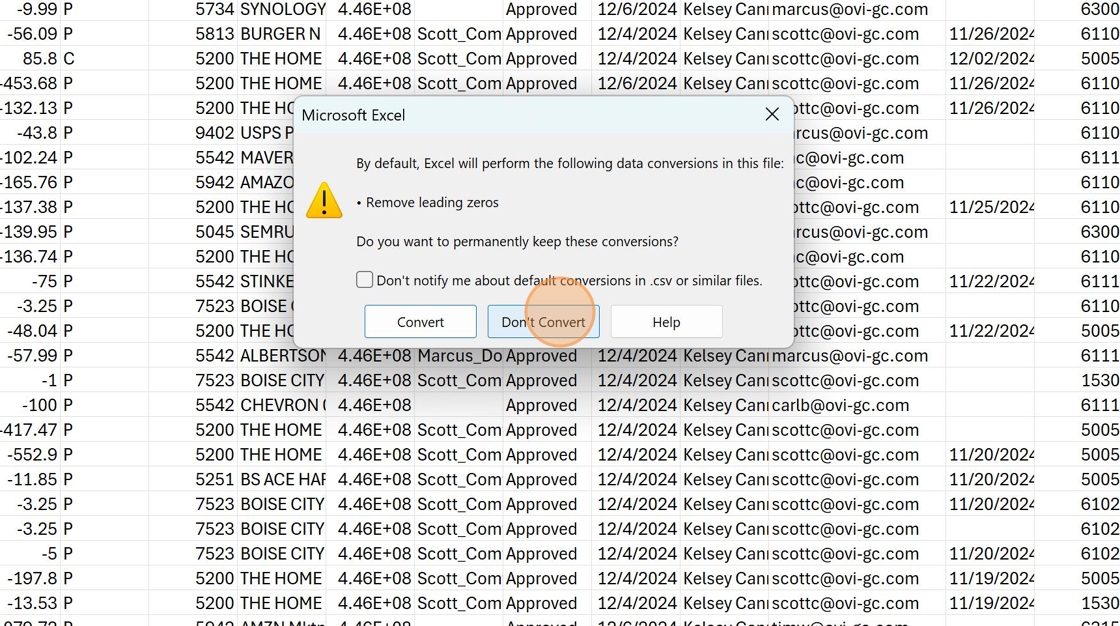
- Open the Downloaded File
Once the file has downloaded, click on the download notification in your browser to open the file.

-
Select File Handling (If Prompted)
If prompted about file conversion, select "Don't Convert" to maintain the original CSV format. Proceed to delete all columns aside from Purchase Date, Description, Amount, Expense Type, Projects, and Cost Code. Expand all columns after the unnecessary columns are deleted.
Tip
Choosing "Don't Convert" ensures the data remains in its original format, which can prevent formatting issues.
Workflow Diagram
graph TD
    A[Start: Access PEX Platform] --> B[Click Reports]
    B --> C[Select Last Month]
    C --> D[Click Preview]
    D --> E[Generate CSV]
    E --> F[Confirm with OK]
    F --> G[Return to Previous Screen]
    G --> H[Access Report History]
    H --> I[Download CSV File]
    I --> J[Open Downloaded File]
    J --> K[Maintain Original Format]
    K --> L[End: CSV Ready for Use]
Checklist
- Accessed Reports section
- Selected "Last month" date range
- Previewed transaction data
- Generated CSV export
- Confirmed export request
- Returned to previous screen
- Accessed Report history
- Downloaded CSV file
- Opened downloaded file
- Maintained original file format
- Saved file to appropriate location for record-keeping
Completion
Once all steps are completed, you will have successfully exported the previous month's PEX transaction data in CSV format for financial reporting, reconciliation, or record-keeping purposes.
Related Information
This PEX Transaction Export procedure supports the following organizational functions: - Financial record-keeping and reconciliation - Expense tracking and management - Monthly financial reporting - Audit preparation